.NET Core直接集成Knife4j #
# (opens new window)IGeekFan.AspNetCore.Knife4jUI(opens new window) (opens new window) #
一个swagger ui 库:knife4j UI (opens new window) (opens new window),支持 .NET Core3.0+或.NET Standard2.0。


# (opens new window)相关依赖项 #
# (opens new window)knife4j(opens new window) (opens new window) #
- knife4j-vue-v3(不是vue3,而是swagger-ui-v3版本)
# (opens new window)Swashbuckle.AspNetCore(opens new window) (opens new window) #
- Swashbuckle.AspNetCore.Swagger
- Swashbuckle.AspNetCore.SwaggerGen
# (opens new window)Demo #
# (opens new window)📚 快速开始 #
# (opens new window)🚀安装包 #
以下为使用Swashbuckle.AspNetCore.Swagger底层组件
1.Install the standard Nuget package into your ASP.NET Core application.
Package Manager :

Install-Package Swashbuckle.AspNetCore.Swagger
Install-Package Swashbuckle.AspNetCore.SwaggerGen
Install-Package IGeekFan.AspNetCore.Knife4jUI

OR

CLI :

dotnet add package Swashbuckle.AspNetCore.Swagger
dotnet add package Swashbuckle.AspNetCore.SwaggerGen
dotnet add package IGeekFan.AspNetCore.Knife4jUI
2.In the ConfigureServices method of Startup.cs, register the Swagger generator, defining one or more Swagger documents.
using Microsoft.AspNetCore.Mvc.Controllers
using Microsoft.OpenApi.Models;
using Swashbuckle.AspNetCore.SwaggerGen;
using IGeekFan.AspNetCore.Knife4jUI;
# (opens new window)🚁 ConfigureServices #
3.服务配置,CustomOperationIds和AddServer是必须的。
   services.AddSwaggerGen(c =>
    {
        c.SwaggerDoc("v1",new OpenApiInfo{Title = "API V1",Version = "v1"});
        c.AddServer(new OpenApiServer()
        {
            Url = "",
            Description = "vvv"
        });
        c.CustomOperationIds(apiDesc =>
        {
            var controllerAction = apiDesc.ActionDescriptor as ControllerActionDescriptor;
            return  controllerAction.ControllerName+"-"+controllerAction.ActionName;
        });
    });
# (opens new window)💪 Configure #
- 中间件配置
app.UseSwagger();

app.UseKnife4UI(c =>
{
    c.RoutePrefix = ""; // serve the UI at root
    c.SwaggerEndpoint("/v1/api-docs", "V1 Docs");
});

app.UseEndpoints(endpoints =>
{
    endpoints.MapControllers();
    endpoints.MapSwagger("{documentName}/api-docs");
});
5.更多功能
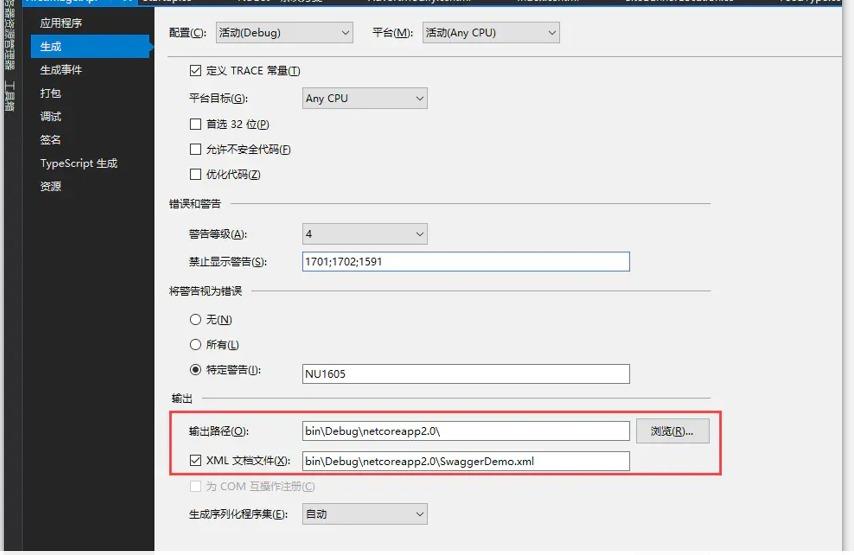
为文档添加注释 在项目上右键--属性--生成

在AddSwaggerGen方法中添加如下代码
c.IncludeXmlComments(Path.Combine(AppContext.BaseDirectory, "SwaggerDemo.xml"),true);
最后一个参数设置为true,代表启用控制器上的注释
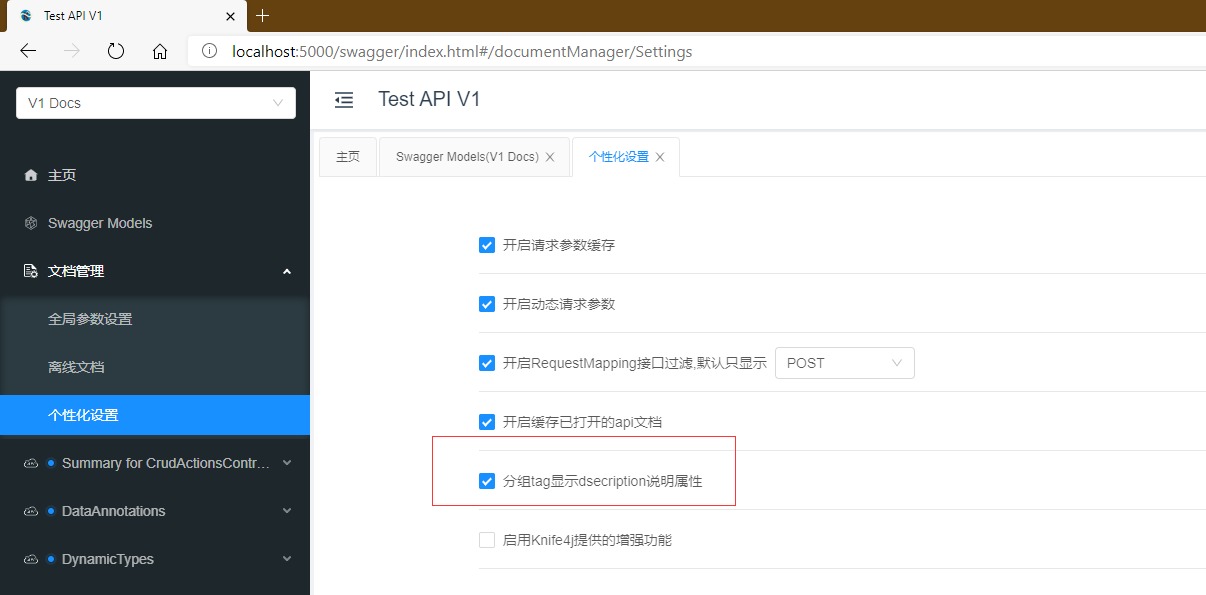
运行后如看不到控制器上注释显示,请点开文档管理->个性化设置,开启分组tag显示description说明属性

# (opens new window)NSwag.AspNetCore #
(请参考目录test/WebSites/NSwag.Swagger.Knife4jUI)
public void ConfigureServices(IServiceCollection services)
 {
    // 其它Service
     services.AddOpenApiDocument();
 }
public void Configure(IApplicationBuilder app, IWebHostEnvironment env)
{
            // 其它 Use
          app.UseOpenApi();
          app.UseKnife4UI(c =>
         {
               c.RoutePrefix = "";
               c.SwaggerEndpoint("/swagger/v1/swagger.json");
          });
}
即可使用 Knife4jUI
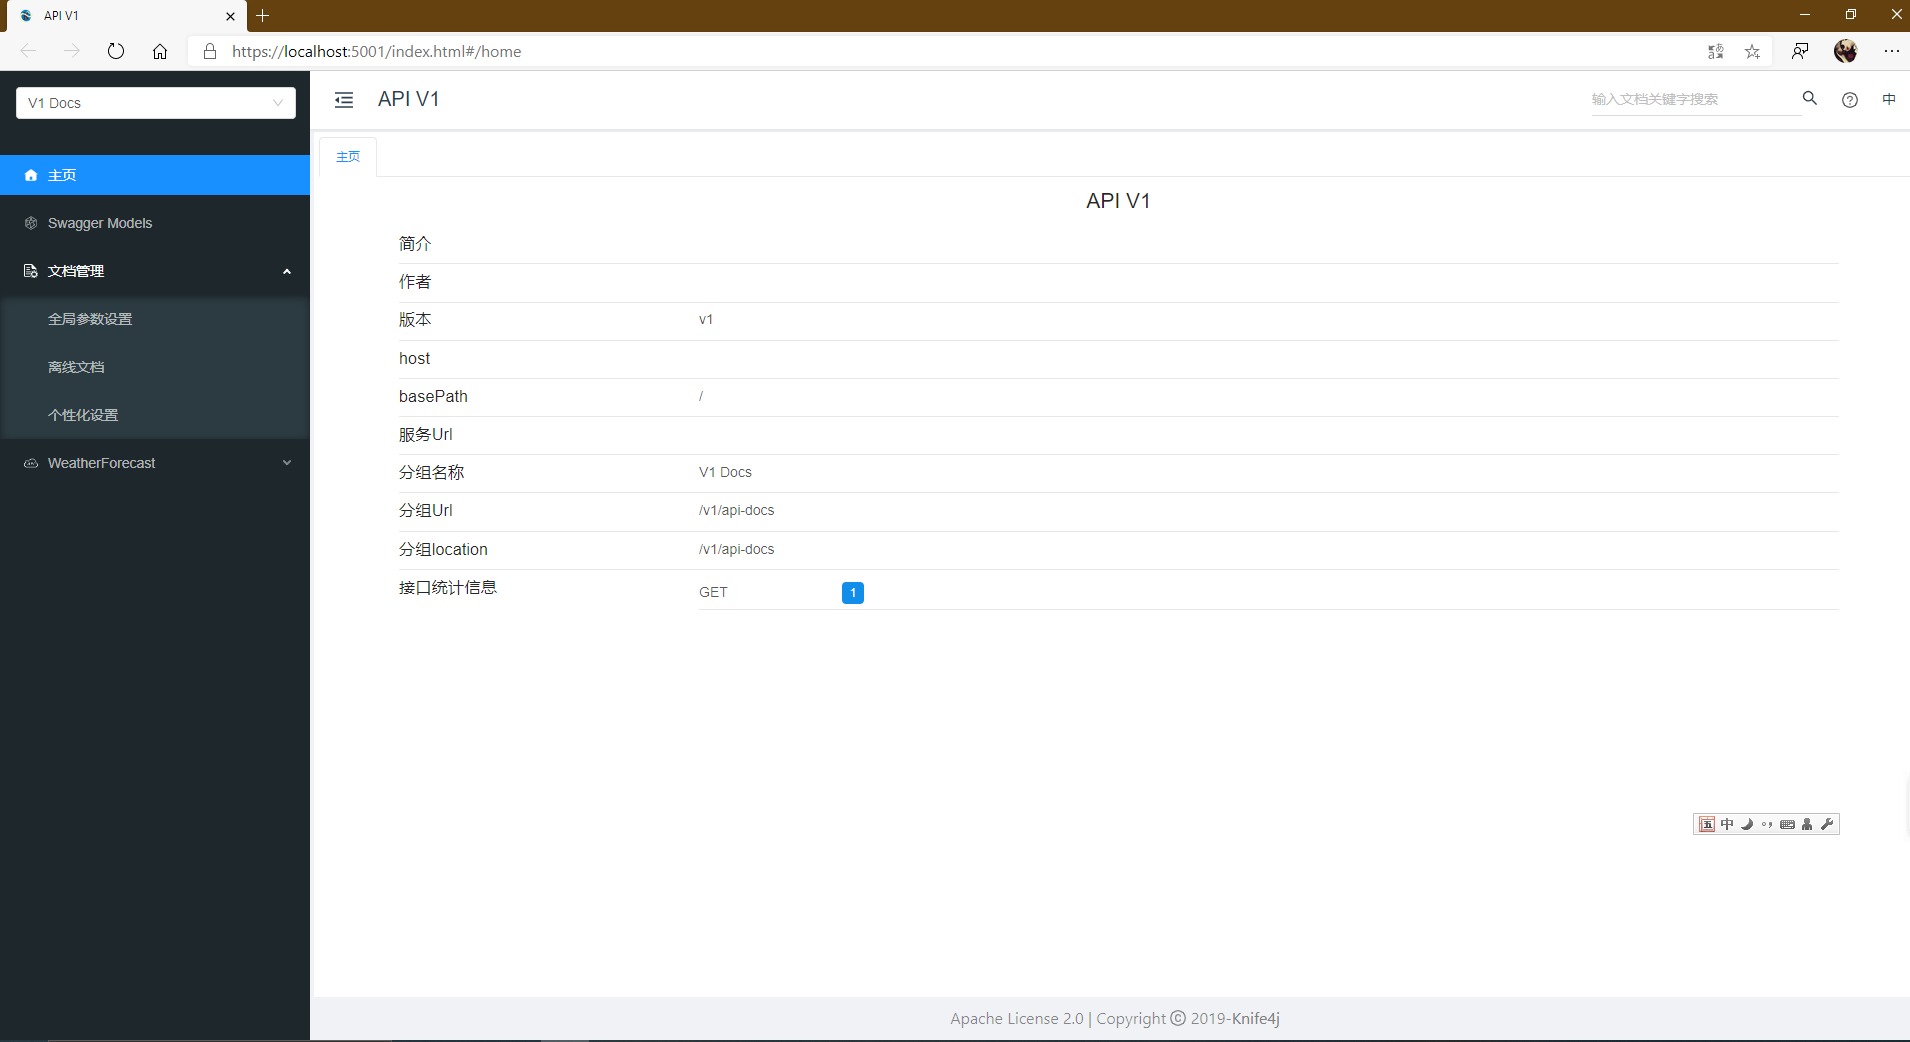
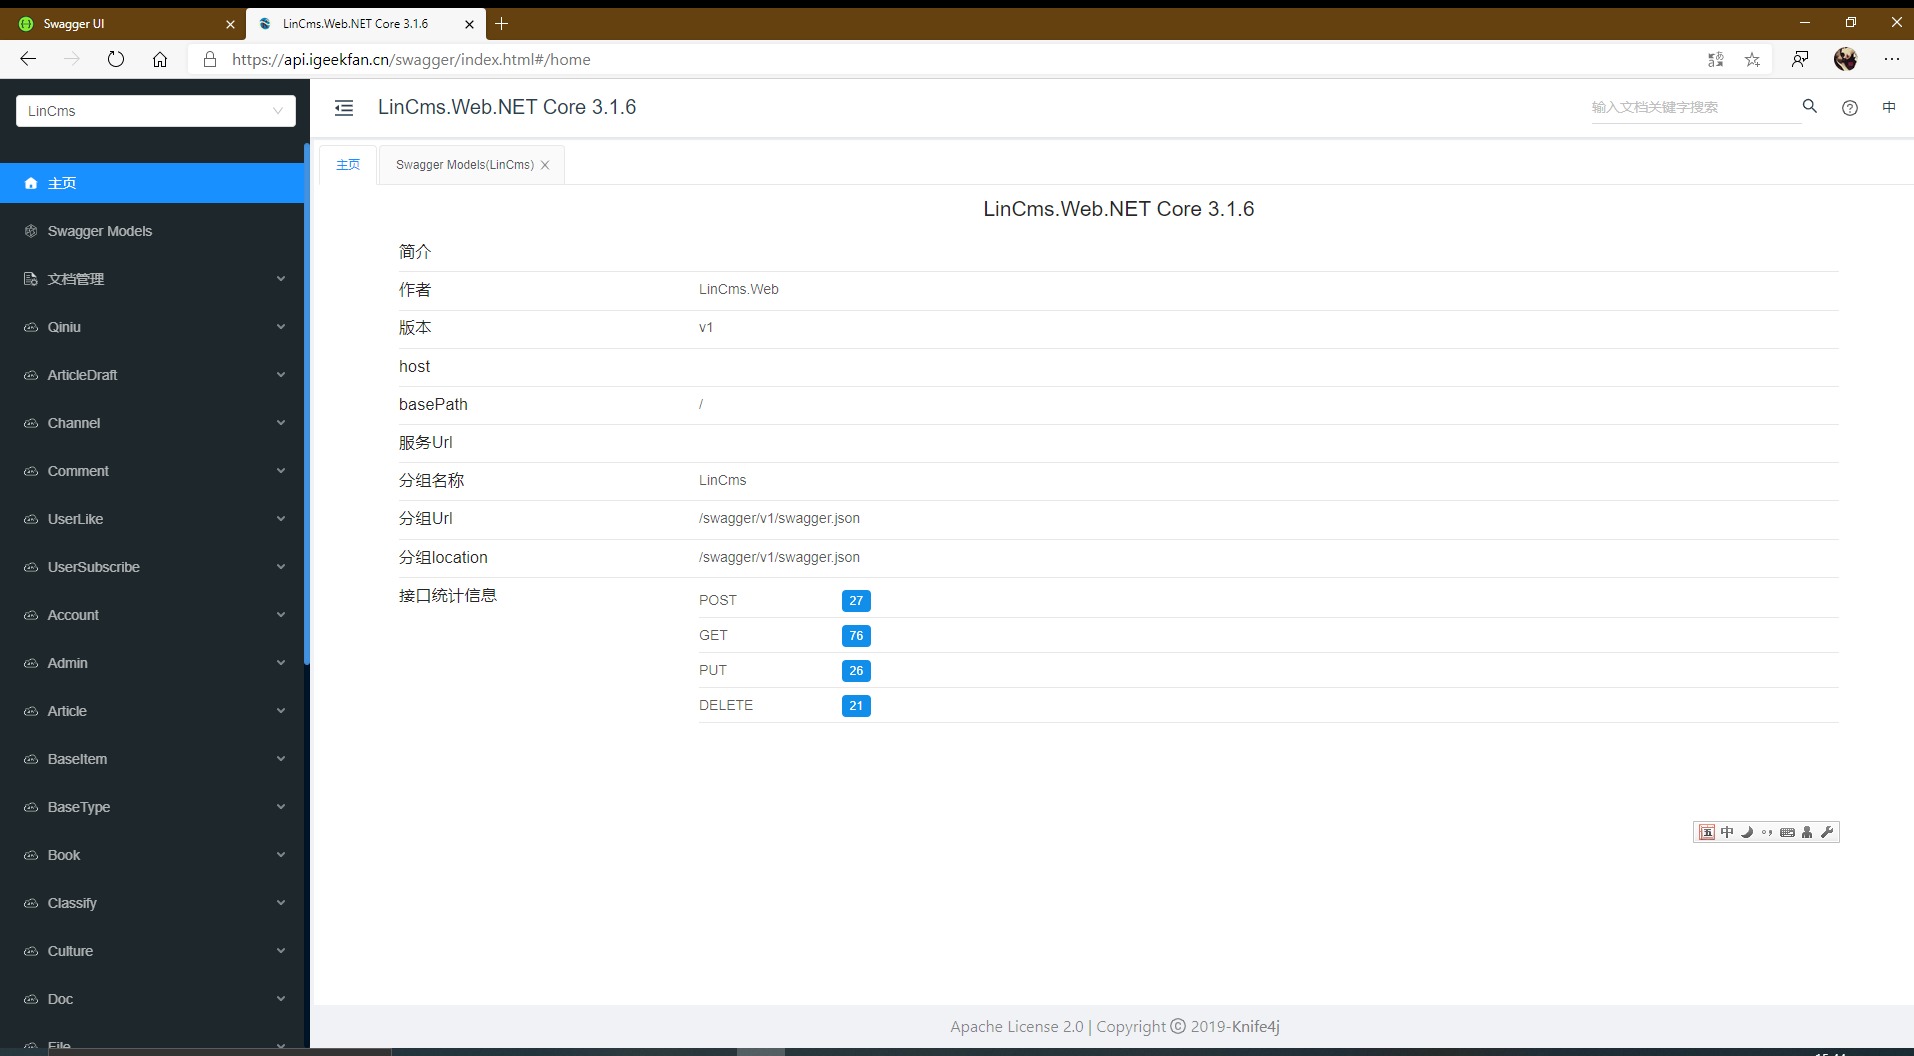
# (opens new window)🔎 效果图 #
运行项目,打开 https://localhost:5001/index.html#/home


